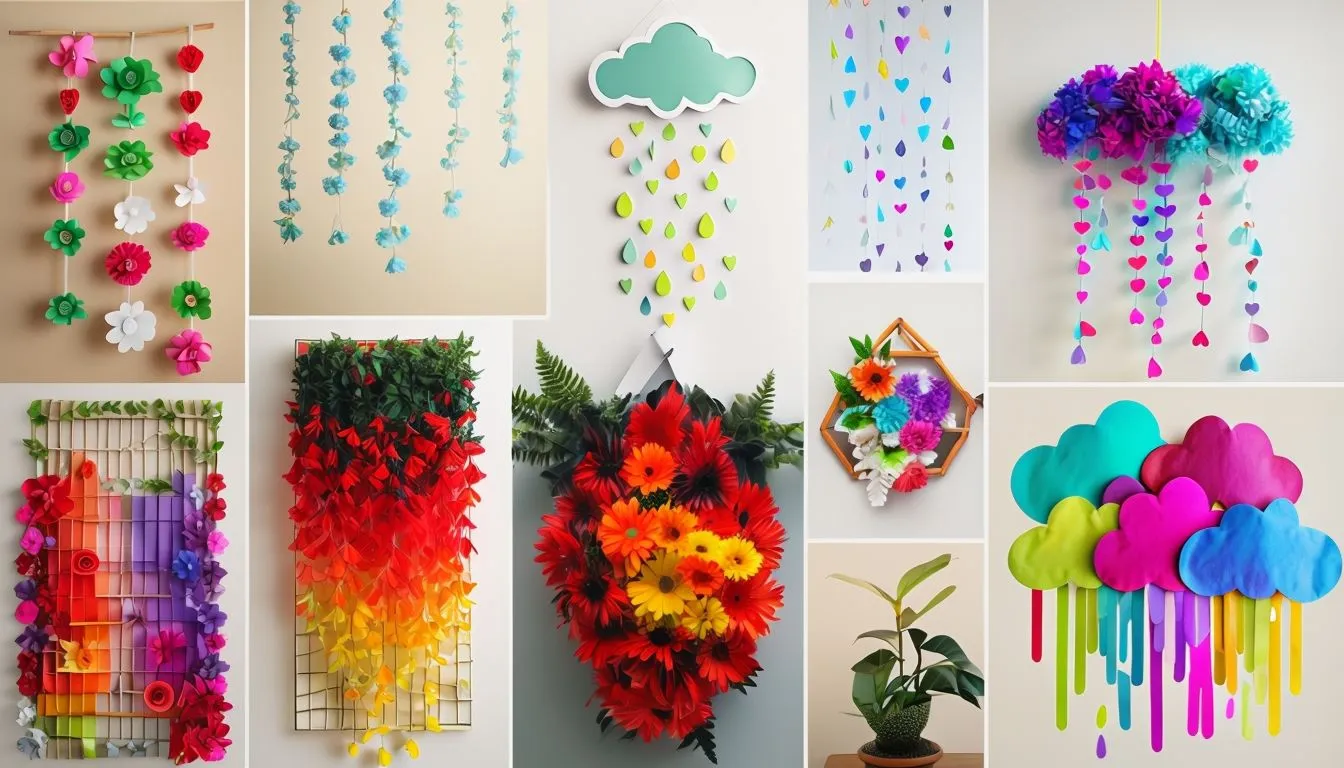
Why Choose DIY Paper Room Decor?
I recently found myself staring at my blank apartment walls, desperately wanting to spruce things up but not wanting to spend a fortune. I had just moved into my first solo apartment (hello, adulting!), and let me tell you, my bank account was giving me the silent treatment after paying that security deposit. That’s when I discovered the magical world of DIY paper room decor, and I’ve been hooked ever since!
Let me tell you a funny story – my first attempt at paper crafting was… well, let’s just say my cat thought the crumpled paper balls on the floor were meant for her. But after some YouTube tutorials and a few paper cuts later (okay, maybe more than a few), I’ve become somewhat of a paper crafting wizard among my friends. Today, I’m excited to share my favorite paper decorating techniques that have transformed not only my space but also the homes of many of my friends who’ve caught the paper-crafting bug from me.
You are probably asking: why in the world DIY paper room decoration? Listen, I get it – when I first mentioned paper decor to my mom, she looked at me like I had suggested hanging grocery bags on the wall. But hear me out! There are so many reasons why paper has become my ride-or-die material for room decoration:
– It’s incredibly budget-friendly (I spent less than $20 on my entire gallery wall – that’s less than
my weekly coffee budget!)
– You can easily change it up when you want a fresh look (unlike that expensive wallpaper my sister regrets installing)
– The possibilities are endless (seriously, I’m still discovering new techniques two years in)
– Most projects require minimal tools (no need to buy that power drill you’ll use once)
– It’s perfect for rentals since it’s temporary (my landlord asked for tips after seeing my space!)
– You can upcycle old magazines and papers (finally, a use for those stacks of magazines you’ve been “saving”)
Materials You’ll Need
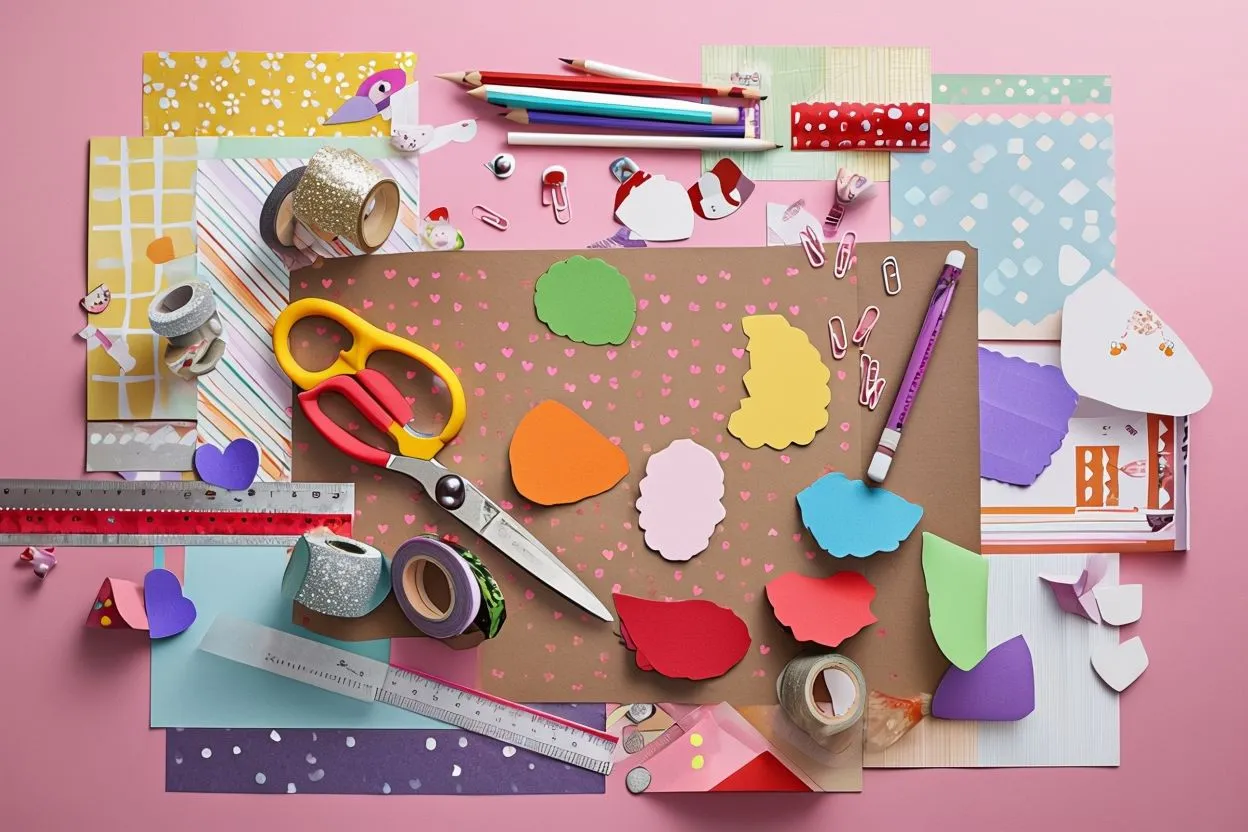
Okay, let’s get down to the nitty-gritty. Here’s what I always keep in my crafting corner (which is just a corner of my dining table, but we’ll call it my “studio”):
Basic Must-Haves
– Different types of paper (I’ll break this down in detail below)
– Scissors (invest in a good pair – trust me, your hands will thank you)
– Glue (both stick and liquid)
– Tape (regular and double-sided)
– Ruler
– Pencil
– String or fishing line (for hanging)
– Command hooks or washi tape
Paper Types Breakdown
Let me share a little secret – not all paper is created equal. Here’s what I’ve learned through trial and error (emphasis on the error):
Construction Paper
Perfect for: Bold, solid-color projects
Price range: $3-8 for a pack
Pro tip: Store flat! I learned this the hard way after finding my stash curled up like potato chips
Origami Paper
Perfect for: Precise folds and detailed work
Price range: $5-15 for a quality pack
Personal experience: Splurge on this one – I tried using printer paper for origami once, and it was like trying to fold a paper towel precisely. Not cute.
Scrapbooking Paper
Perfect for: Statement pieces and textured effects
Price range: $10-20 for a themed pack
Why I love it: The patterns can make even simple projects look professional
Recycled Materials
– Old magazines (fashion magazines work best – those glossy pages are *chef’s kiss*)
– Newspapers (the crossword section has the best paper quality, FYI)
– Book pages (from books you’ll never read again, of course – no literary sacrifices necessary!)
– Gift wrap scraps (I keep a “maybe I’ll use this someday” box, and guess what? I actually do!)
15 Creative Paper Room Decor Ideas (That Look Expensive)
1. 3D Geometric Wall Art
Remember that $300 wall sculpture you saw at that fancy home decor store? Yeah, we’re going to make something similar for about $5.
When I first tried this, I was honestly skeptical. My first attempt looked like something my nephew would make in kindergarten (love you, buddy!). But then I discovered the secret: precision and patience.
Step-by-Step Guide
1. Cut several same-sized squares from cardstock
Pro tip: Use a paper cutter if you can. My first attempt with scissors looked like I’d cut them blindfolded
2. Fold each square diagonally
Critical step: Use a bone folder (or an old gift card) for crisp folds
3. Arrange them in a pattern
Try this: Lay out your design on the floor first. My coffee table still has glue marks from when I didn’t follow this advice
4. Glue or tape together
Game-changer: Use tacky glue instead of regular white glue
5. Mount on the wall using command strips
Real talk: My first attempt took about 3 hours, but now I can whip one up during a Netflix episode.
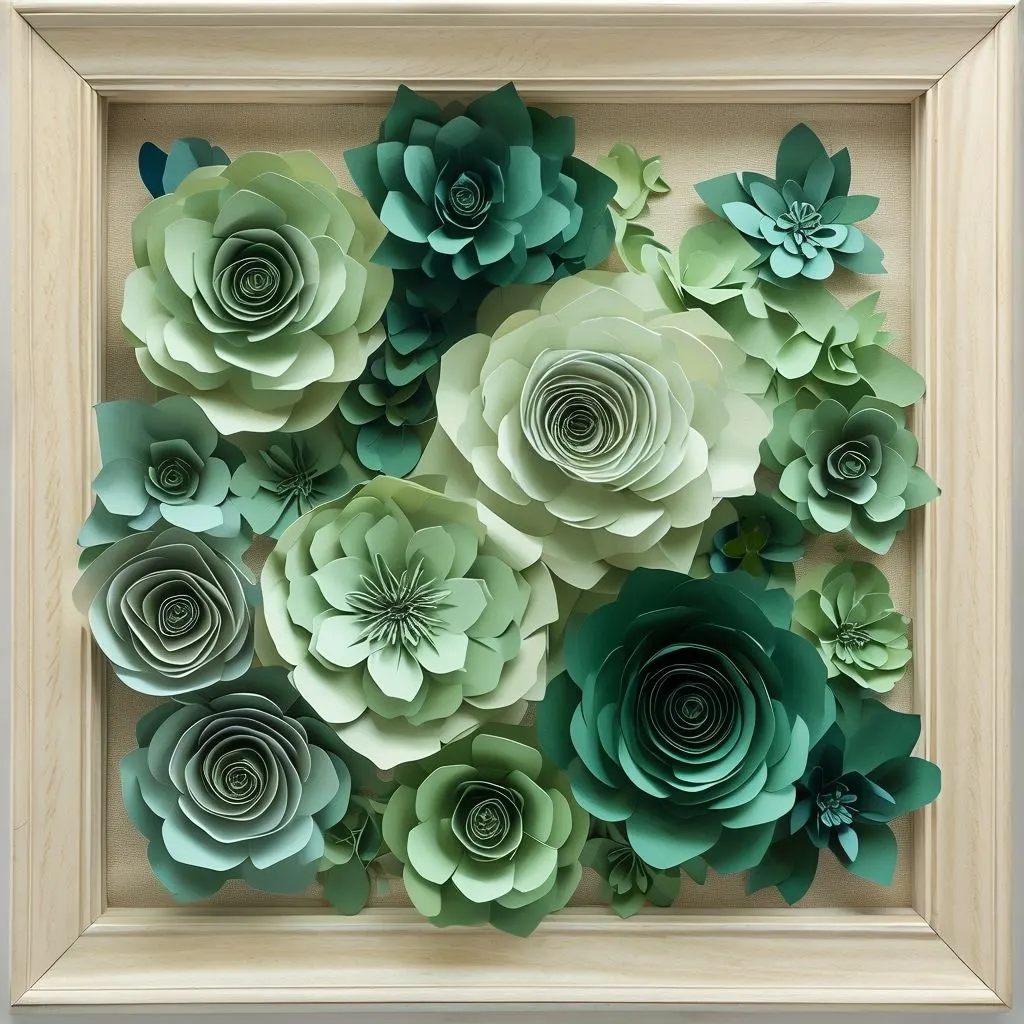
2. Paper Flowers
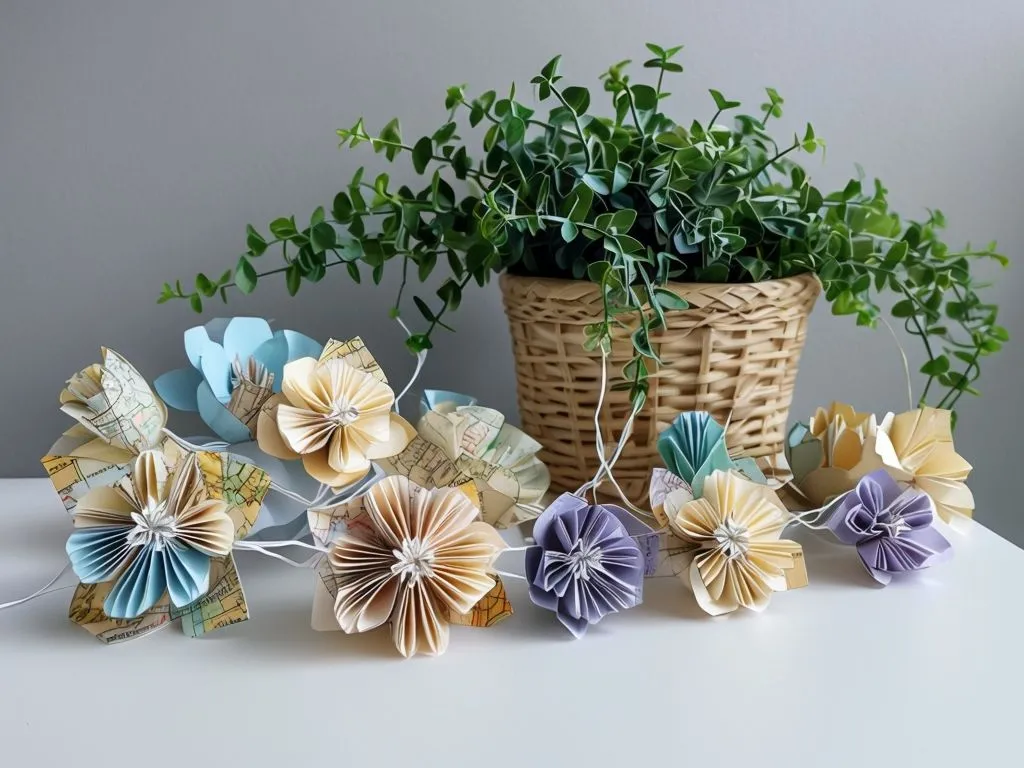
You won’t believe the number of compliments I get on this showstopper! When I first attempted it, I was trying to brighten up my home office for virtual meetings. What started as a small accent piece turned into an entire feature wall that’s now the highlight of my apartment. The best part? Each time I make a new flower, I get better at it, and the wall keeps evolving.
Think of it as a living art piece that grows with your skills. My first few flowers looked like they’d been through a paper shredder (hey, we all start somewhere!), but now I can whip up a perfect rose while binge-watching my favorite show.
Step-by-Step Guide
1. Choose 3-4 complementary colors
Pro tip: Use different shades of the same color for depth
2. Make different-sized flowers
– Start with larger ones as your base
– Mix in medium and small ones for dimension
3. Create leaves and stems
– Use a slightly darker green than you think you need
4. Arrange on the wall in a flowing pattern
– Layout your design on the floor first
– Take a photo to reference while mounting
Real talk: My first attempt took an entire weekend, but now I can add a new flower in about 15 minutes. And yes, I did accidentally glue my fingers together more than once!
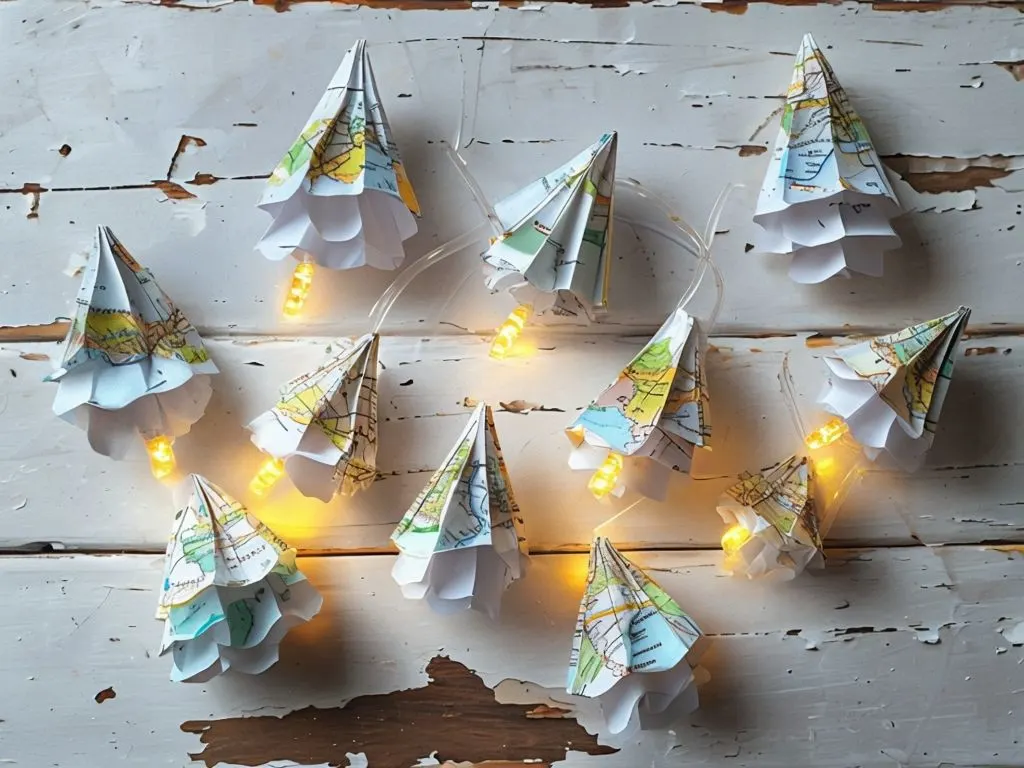
When my best friend saw these in my bedroom, she immediately demanded a tutorial! These delicate light catchers combine the Zen of origami with the cozy vibe of string lights, creating pure magic when the sun hits them just right. I originally made these for the holiday season, but they looked so good that they’ve become a permanent fixture.
The trick is to use paper thin enough to let light through but sturdy enough to hold its shape. Trust me, I learned this the hard way after my first batch turned into sad, droopy shapes after a week.
Step-by-Step Guide
1. Create small origami shapes
– Start with cranes (the classic choice)
– Keep them all the same size for uniformity
2. String onto fairy lights
– Use a clear fishing line for invisible support
– Space them evenly (use a ruler!)
3. Secure each piece
– Double-knot everything
– Add a tiny dab of clear glue for extra hold
4. Hang strategically
– Avoid direct sunlight
– Keep away from air vents
Pro tip: Make a few extra pieces – trust me, you’ll need replacements eventually!
4. Magazine Page Mandala
Here’s a project that turned my “I’ll read these someday” magazine pile into gorgeous wall art! When my sister saw it, she couldn’t believe it was made from old fashion magazines. The secret? The glossy pages create an almost metallic effect when layered properly. Plus, it’s a great way to finally put those stacks of magazines to use (sorry, Marie Kondo!).
I discovered this technique by accident while procrastinating on cleaning my room, and now it’s my go-to project for instant wall glamour. The best part is that no two mandalas ever look exactly alike!
Step-by-Step Guide
1. Cut pages into similar-sized strips
– Use a paper cutter for precise edges
– Sort by color families
2. Arrange in a circular pattern
– Start from the center
– Work outward in rings
3. Layer and glue carefully
– Use acid-free glue to prevent yellowing
– Press each layer flat
4. Frame or mount directly
– Let it dry completely first
– Use clear fishing line to hang
Pro tip: Keep a reference point marked at the center – I learned this after creating an accidentally abstract (read: wonky) design!
5. Paper Chain Curtain
Lighting can make or break your spa-like bathroom experience. After years of experimenting, I’ve found that layered lighting is crucial. Start with ambient lighting – I love installing dimmable LED recessed lights that you can adjust depending on your mood.
Step-by-Step Guide
1. Cut strips of paper in coordinating colors
– Make them the same width
– Use a paper cutter for precision
2. Create interlocking chains
– Secure each link with strong glue
– Maintain consistent tension
3. Connect multiple strands
– Space them evenly
– Vary lengths for interest
4. Hang securely
– Use a sturdy rod or string
– Add weights at the bottom
Real talk: Count your links before starting – my first curtain ended up hilariously lopsided because I didn’t plan ahead!
6. Honeycomb Wall Display
This project turned my boring video call background into a conversation starter! The hexagon shapes create a modern, almost 3D effect that makes everyone ask if I hired a professional decorator. Little do they know it all started with some cardstock and a geometry refresher from YouTube!
I’ll admit, my first attempt looked more like squashed circles than hexagons, but once I created a template, everything clicked into place. Now I can make these in my sleep!
Step-by-Step Guide
1. Cut hexagon shapes
– Make a sturdy template first
– Use heavyweight paper
2. Score and fold edges
– Be precise with scoring
– Create clean, sharp folds
3. Connect multiple hexagons
– Plan your pattern first
– Use strong adhesive
4. Add personal touches
– Insert photos
– Leave some empty for depth
Pro tip: Draw your entire design on the wall with a pencil first – my freestyle attempt ended up looking like a geometry experiment gone wrong!
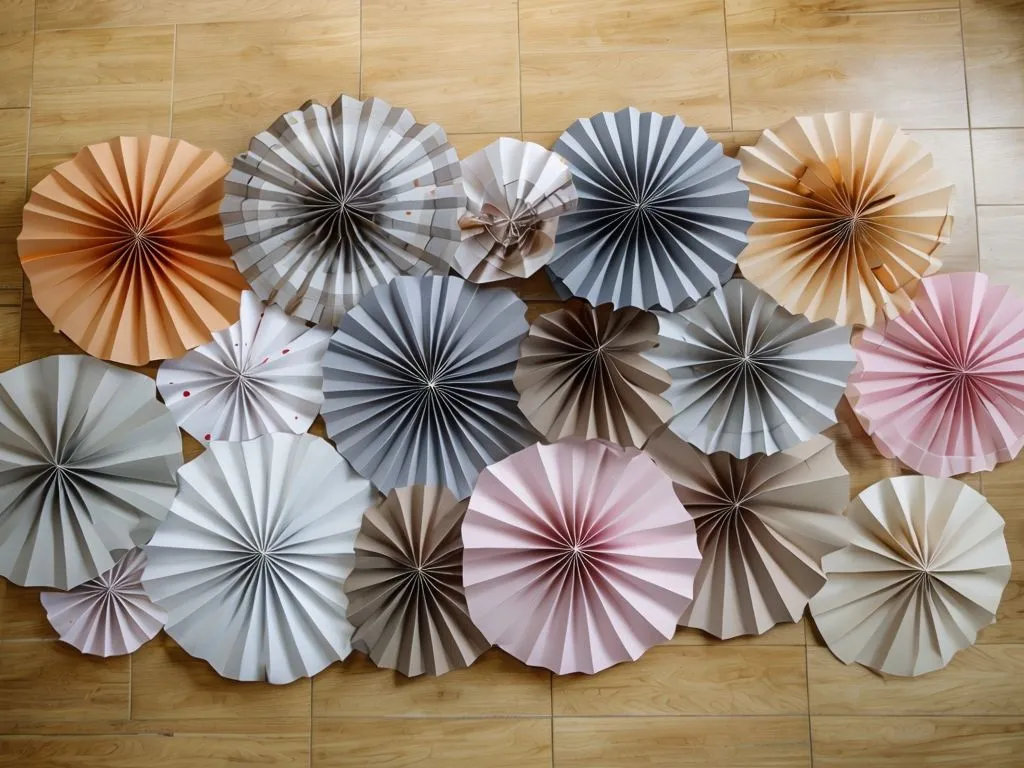
7. Paper Pinwheels
Don’t let the playful nature of pinwheels fool you – these babies can look seriously sophisticated when done right! I started making these for a friend’s baby shower, but they looked so good that I ended up creating an entire wall installation in my entryway.
The trick is varying the sizes and creating perfect centers. And yes, I did spend one entire evening just figuring out how to make them spin (spoiler alert: it’s all in the pin placement!).
Step-by-Step Guide
1. Choose patterned paper
– Mix solids and patterns
– Use double-sided paper for best results
2. Create pinwheels in various sizes
– Make precise diagonal folds
– Keep centers aligned
3. Secure centers properly
– Use decorative brads
– Add beads for extra flair
4. Mount thoughtfully
– Create a flowing pattern
– Vary distances from the wall
Reality check: Your first few might look like they’ve been through a windstorm – keep at it!
8. Woven Paper Basket
Talk about a conversation starter! These baskets have saved my desktop from becoming a chaos zone of random receipts and sticky notes. When my coworkers spotted one during a video call, I ended up hosting a virtual crafting session to teach them how to make their own. Who knew office organization could be this stylish?
I’ll be honest – my first attempt looked more like a crumpled paper ball than a basket. But once I got the weaving pattern down, I couldn’t stop making them. Now I have them in every room, and they’re sturdy enough to hold real stuff!
Step-by-Step Guide
1. Cut paper strips
– Make them equal in width
– Use a ruler and sharp blade
2. Create a sturdy base
– Weave tightly
– Secure corners well
3. Weave sides carefully
– Maintain even tension
– Keep pattern consistent
4. Add a decorative edge
– Fold tops neatly
– Secure with clear tape
Pro tip: Start with a smaller basket – my first large one collapsed spectacularly mid-weave!
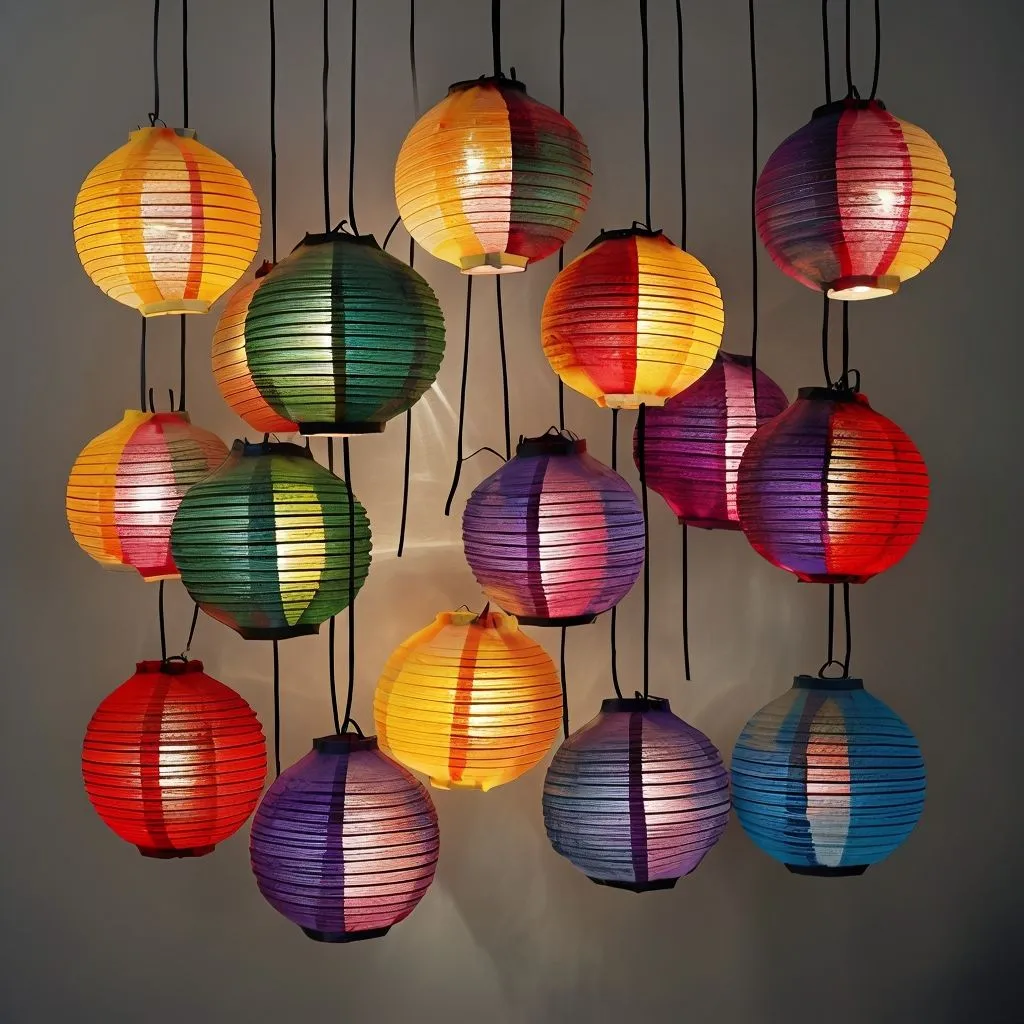
9. Paper Lanterns
Let me tell you about the time I turned my boring overhead light into a magical paper paradise! These lanterns create such amazing shadows that my roommate thought I’d hired a lighting designer. The best part? They look even better at night when the light creates gorgeous patterns on your walls.
My first batch caught a slight singe from being too close to the bulb (rookie mistake!), but now I’ve perfected the art of heat-safe hanging. They’re perfect for both everyday decor and special occasions.
I also recommend creating a cleaning schedule that works with your lifestyle. Instead of marathon cleaning sessions, I do small tasks daily. Every morning after my shower, I wipe down surfaces with a microfiber cloth. This takes less than two minutes but keeps everything looking pristine.
Step-by-Step Guide
1. Score and fold paper
– Use a template for consistency
– Make crisp, clean folds
2. Create a basic shape
– Start with simple designs
– Build up to complex ones
3. Add battery-operated lights
– Never use real candles!
– Secure lights properly
4. Hang in clusters
– Vary heights
– Mix sizes for interest
Safety first: Keep them away from any heat source – learned this one the hard way!
10. Quilling Art Display
If you want to impress people, quilling is your secret weapon! When I first discovered this technique, I spent an entire weekend rolling tiny strips of paper, and yes, my fingers were sore, but the results were worth it! This Victorian-era art form looks incredibly complex, but it’s just cleverly rolled paper.
The first piece I made looked like a kindergarten project, but now I can create intricate designs that people mistake for professional artwork. It’s become my go-to method for creating custom wall art.
Step-by-Step Guide
1. Roll thin strips of paper
– Invest in a quilling tool
– Keep tension consistent
2. Shape into forms
– Master basic shapes first
– Combine for complexity
3. Arrange in patterns
– Plan design beforehand
– Work from center out
4. Secure everything
– Use tiny dots of glue
– Let dry completely
Patience alert: This isn’t a quick project, but trust me, the “wow” factor is worth it!
11. Paper Book Page Wreath
Being a book lover, this project was initially painful (sorry, old paperback!), but the result was so stunning that I’ve made peace with sacrificing a few damaged books for art. This wreath hanging on my door has fooled multiple visitors into thinking it’s an expensive boutique purchase.
The secret is in the rolling technique and patience – lots of patience. I watched an entire season of my favorite show while making my first one, but now I can complete one in just a couple of hours.

Step-by-Step Guide
1. Roll book pages tightly
– Roll at an angle
– Vary tightness for texture
2. Create a circular base
– Use sturdy cardboard
– Make it perfectly round
3. Attach rolled pages
– Start from outside
– Layer strategically
4. Add finishing touches
– Spray with preservative
– Add hanging ribbon
Book selection tip: Use old romance novels – their pages yellow beautifully with age!
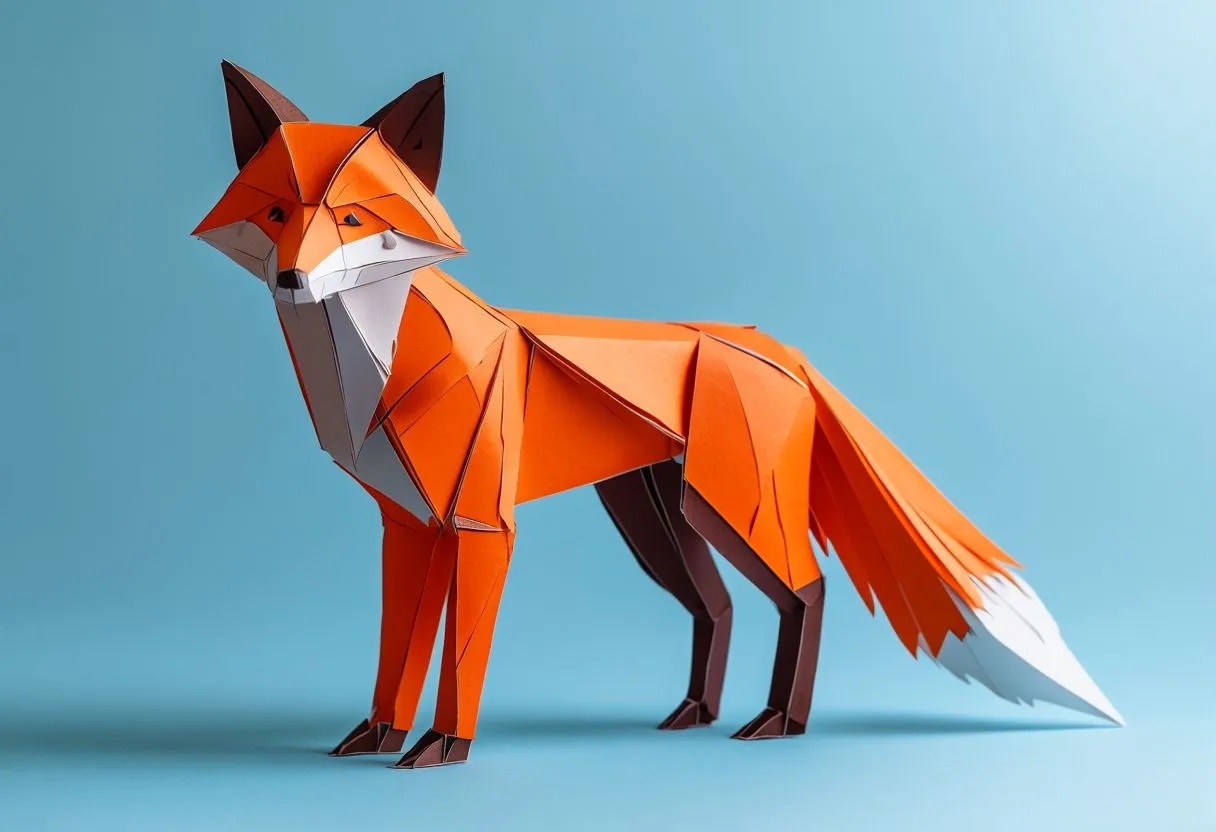
12. Geometric Paper Animals
These modern paper sculptures started as a weekend project and turned into an obsession! After making my first fox (which, honestly, looked more like a confused dog), I couldn’t stop. Now I have a whole paper safari on my wall, and every visitor wants to know where I bought them. The look on their faces when I say “I made them” is priceless!
The key is precision in folding and a lot of patience. I spent an entire evening just figuring out how to make the perfect crease, but once you get that down, the rest is like putting together a 3D puzzle.
Step-by-Step Guide
1. Download or create templates
– Start with simpler animals
– Print on thick paper
2. Cut and score precisely
– Use a sharp blade
– Score all fold lines first
3. Fold and assemble
– Follow numbered sequences
– Test fit before gluing
4. Mount securely
– Use strong adhesive
– Create proper support
Pro tip: Color-code your fold lines (mountain vs. valley) – saved me from many geometric disasters!
13. Paper Leaf Garland
After years of designing minimalist bathrooms, I’ve come to see them as more than just spaces for daily routines – they’re investments in our well-being. Every morning when I step into my carefully designed bathroom, I feel a sense of calm that sets the tone for my entire day. It’s like having a luxury spa membership, but instead of driving across town, your sanctuary is just steps away.
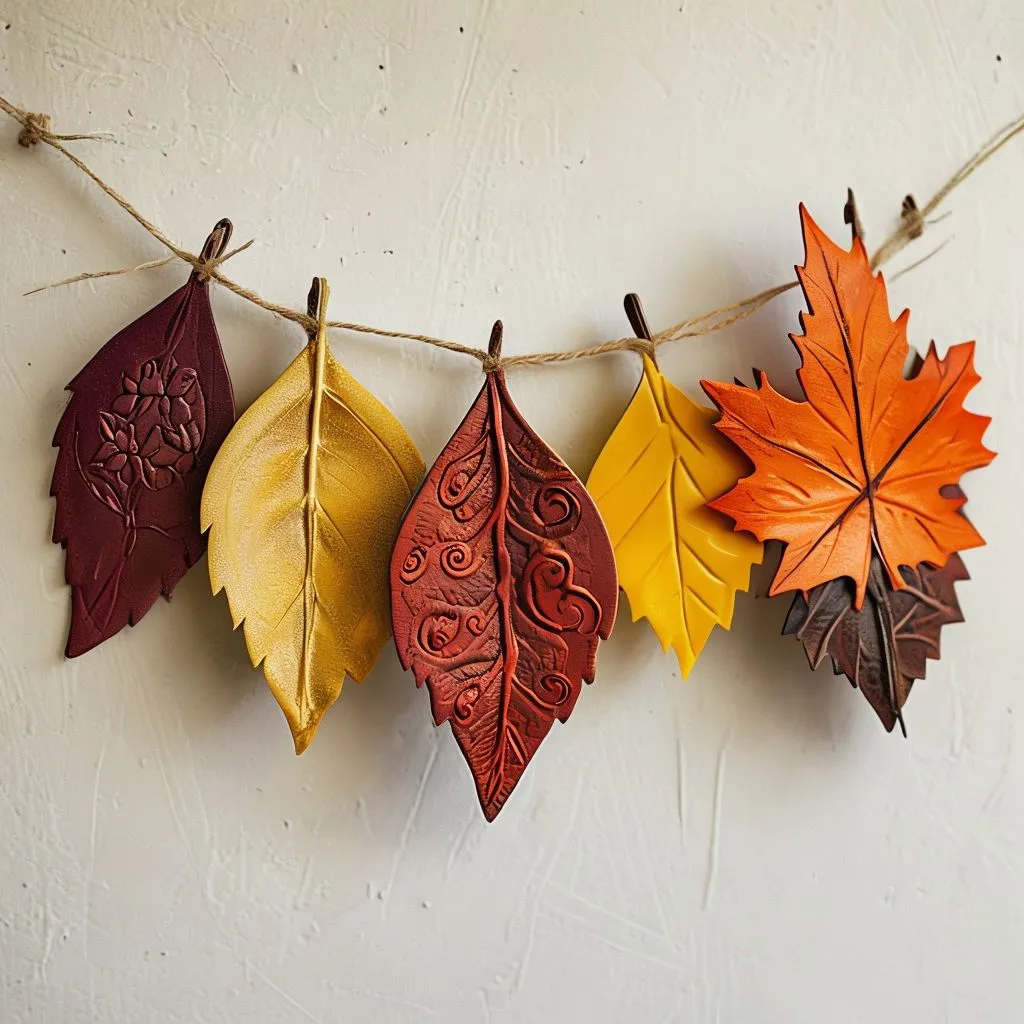
After killing my third houseplant, I decided to go with something more my speed – paper plants! This leaf garland brings the perfect touch of nature without the need for watering. It started as a fall decoration but looked so good I kept it up year-round, just changing the colors with the seasons.
Step-by-Step Guide
1. Cut various leaf shapes
– Use real leaves as templates
– Include different sizes
2. Add realistic details
– Draw veins with a pen
– Create subtle curves
3. String leaves together
– Use strong thread
– Space evenly
4. Hang with style
– Create natural swags
– Secure ends well
Nature hack: Press real leaves to use as templates – way easier than drawing freehand!
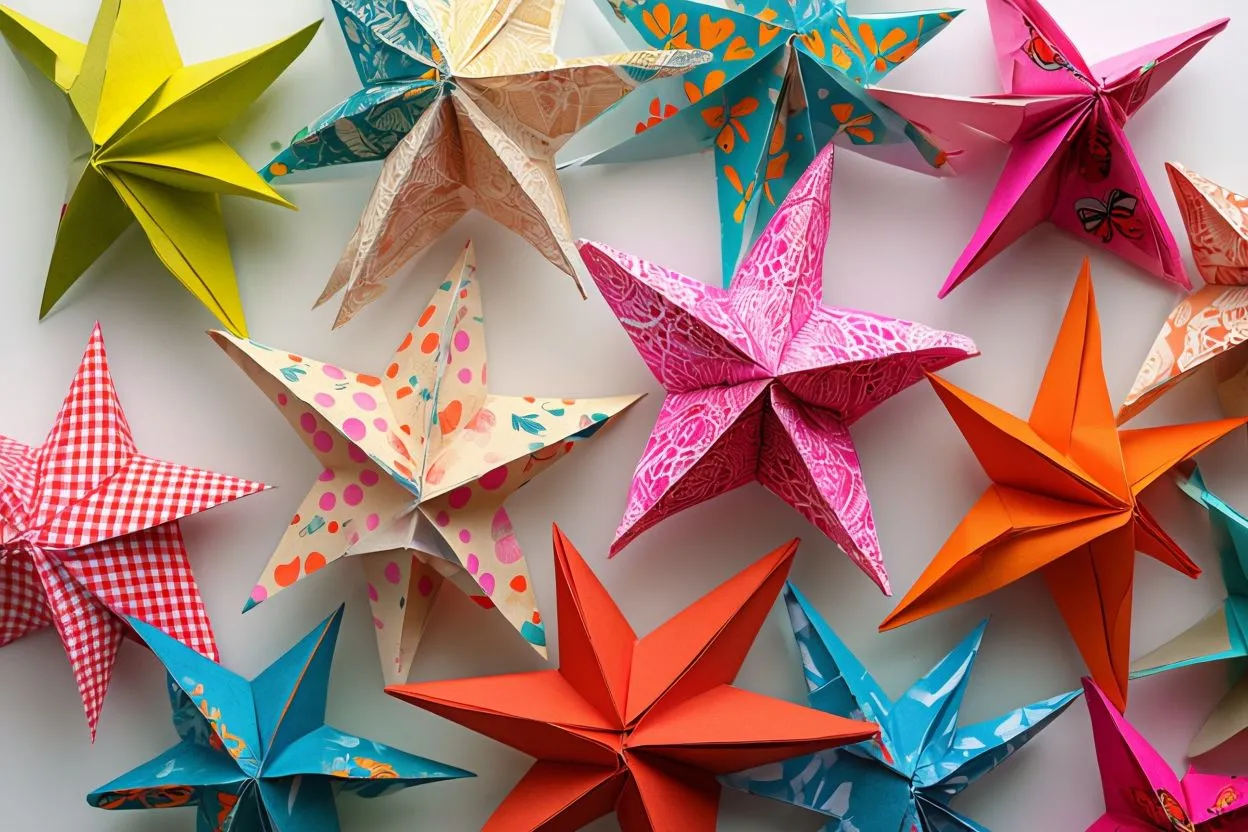
14. 3D Paper Stars
These stars were born out of a holiday decoration attempt but ended up becoming a year-round feature in my room. Would you believe my first star looked more like a crumpled paper ball? Now they’re so perfect, that my neighbor commissioned me to make some for her daughter’s room!
The magic happens in the folding technique and the way light plays off the angles. Once you get the basic fold pattern down, you can make these in any size – though I learned the hard way that bigger isn’t always better!
Step-by-Step Guide
1. Cut star patterns
– Use template for first few
– Keep points symmetrical
2. Score fold lines
– Be precise with creases
– Use the bone folder tool
3. Create 3D effect
– Fold points carefully
– Maintain even pressure
4. Hang thoughtfully
– Vary heights
– Create constellations
Light trick: Hang near a window – the shadows they cast are amazing!
15. Paper Mosaic Wall Art
This project happened by accident when I was cleaning up my paper scraps and noticed how pretty the colors looked together. Instead of throwing them away, I turned them into what’s now the focal point of my living room. Everyone thinks it’s a professional piece, and I’m not correcting them!
The secret is in the color placement and patience – lots of patience. Think of it like painting with paper, where each tiny square contributes to the bigger picture.
Step-by-Step Guide
1. Create a design outline
– Start simple
– Draw a grid pattern
2. Cut tiny paper squares
– Make a square template
– Sort by color
3. Arrange pattern
– Work in small sections
– Step back often
4. Secure properly
– Use archival glue
– Press each piece flat
Organization tip: Sort paper squares by color in muffin tins – saves tons of time and sanity!
This completes all of my 15 detailed paper decor ideas! Each one has been crafted through personal experience, trial and error, and a lot of learning moments.
Personal Project Diary
I thought it might be helpful to share my actual journey with one of these projects. Let’s talk about my paper flower wall adventure:
Day 1: The Inspiration
Saw a TikTok of someone’s amazing paper flower wall. Thought “I can do that!” (fact: I could not do that. At least not yet.)
Day 2: The Supply Run
Spent way too long in the craft store. Had to talk myself out of buying $50 worth of “just in case” supplies. Left with the basics and only slightly regretted not buying that cute washi tape.
Day 3-5: The Learning Curve
– Made about 20 flowers that looked like they’d been through a paper shredder
– I finally watched some tutorials instead of just “winging it”
– Discovered the importance of proper paper weight (printer paper is NOT it)
– Had a breakthrough with the petal-folding technique
Day 6-7: The Assembly
I created a template system that saved hours. Ended up with a gorgeous feature wall that’s now the backdrop for all my Zoom calls.
Common Mistakes and How to Avoid Them
Do I have some stories for this section? Let me share some of my most memorable crafting failures so you can learn from my mistakes:
The Great Glue Disaster of 2022
I thought more glue meant better hold. Ended up with warped paper and a ruined dining table. Lesson learned: Less is more, and always use a protective surface!
The “I Don’t Need to Measure” Fiasco
Tried to eyeball the measurements for a geometric pattern. It looked like an M.C. Escher drawing gone wrong. Now I measure twice, cut once, and my walls thank me.
The “It’ll Dry Clear” Myth
Spoiler alert: Not all glue dries clear, regardless of what the bottle says. Test on a scrap piece first!
Tools You Will Need vs. What’s Nice to Have
Essential Tools (The Bare Minimum)
These are the tools I use on every single project:
– Sharp scissors (invest in a good pair – your hands will thank you)
– Ruler (metal ones are best – I learned this after melting a plastic one with hot glue)
– Pencil
– Eraser (trust me, you’ll need it)
Nice-to-Have Tools (But Don’t Break the Bank)
– Paper cutter (game-changer for straight lines)
– Bone folder (or use an old credit card like I did for the first six months)
– Craft knife and cutting mat
– Circle cutter (if you’re serious about paper flowers)
“Save Your Money” Tools
Things the craft store will try to sell you but you don’t need:
– Special paper-cutting scissors (regular sharp scissors work fine)
– Expensive paper storage systems (a clean shoebox works great)
– Fancy adhesive dispensers (basic glue sticks are your friends)
Maintenance Guide
Daily Care
– Dust with a soft makeup brush (I stole this trick from my grandmother)
– Keep windows closed on super humid days (learned this after my origami crane mobile turned into sad, droopy birds)
– Avoid touching with dirty hands (my roommate’s pizza fingers taught me this lesson)
Monthly Maintenance
– Check all adhesive points
– Rotate pieces away from direct sunlight
– Touch up any loose edges
Seasonal Updates
– Change colors with the seasons (super easy and makes you look super put-together)
– Check for any water damage or fading – Consider refreshing high-traffic areas
My Final Thoughts
You know what’s funny? When I started this paper decor journey, I thought it would be a temporary solution until I could afford “real” decorations. But here I am, two years later, with a home that feels more “me” than any store-bought decor ever could. And the best part? Every time someone visits, they ask where I bought my wall art, and I get to say, “Oh, I made that!” (The look on their faces is priceless!)
Have you tried any of these paper decor ideas? I’d love to see your creations! Share your photos in the comments below or tag us on social media using #PaperDecorDIY. And hey, if your first attempt looks like it was made by a toddler (like mine did), embrace it! We all start somewhere, and I promise it will get better with practice.
Ready to get started? Grab some paper, put on your favorite playlist (may I suggest my “Crafting Queens” Spotify playlist?), and let your creativity flow. Trust me – once you start creating paper decor, you’ll never look at a blank wall the same way again!
P.S. If you mess up, just remember: paper is cheap, and pizza makes everything better. That’s my crafting motto, and I’m sticking to it!
